
In this small tutorial I will show you how to enable Web Deploy in visual studio 2013 for your own windows server. Its really easy but if you don’t know where to start it can still be very frustrating.
Warning: You cannot set up remote publishing using Web Deploy for a site that is hosted in IIS on Windows 8.0 or 8.1. The reason is that the client SKUs for Windows do not come with the Web Management Service that is required for remote connections. As a result, on Windows 8.0 or 8.1, the IIS Manager Permissions icon and the Configure Web Deploy Publishing deployment option that are required to configure remote publishing are not available in the IIS Manager.
Don’t skip the warning on top. I tried to get it working on Windows 8 and it took me a whole day before i figured out it was not possible. Of course you can still use ftp deployment instead.
First step go to your WIndows Server and run the Web Platform Installer. Then search for the Recommended Server Configuration for Web Hosting Providers and install it.
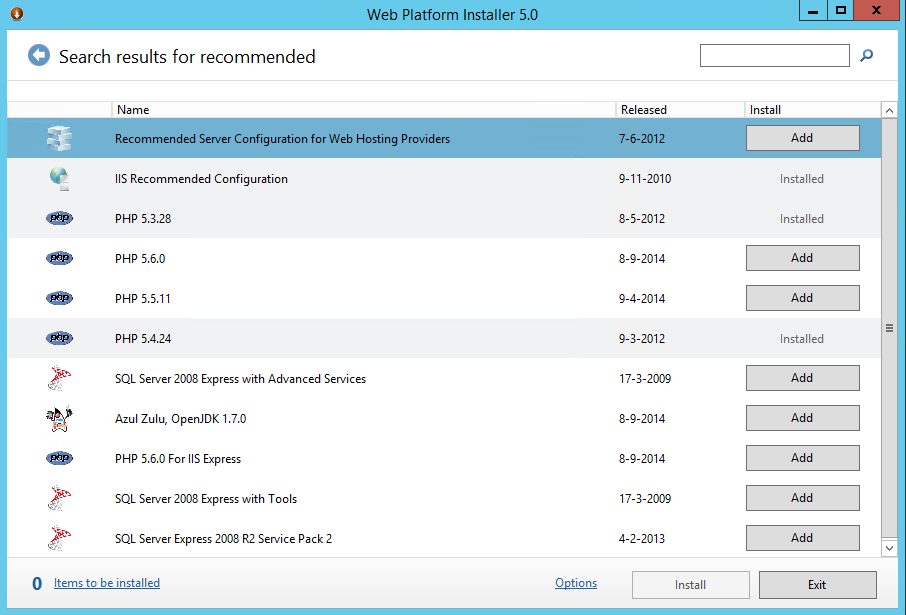
Web Platform installer 5.0
If you cant find ‘Recommended Server Configuration for Web Hosting Providers you are probably using a windows version that is not supported like windows 8.x
After installing it open your IIS Manager and select your site for which you want to enable web deploy. Then open IIS Manager Permissions.
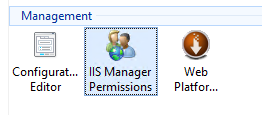
IIS Manager Permissions
Add here a user that is allowed to do a web deploy to this website.
Next right click on your site and choose Deploy -> Configure Web Deploy Publishingfrom the submenu.
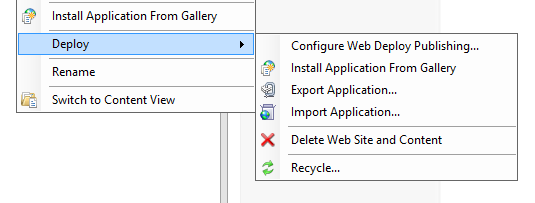
Right-Click menu on a Site in IIS
This opens a configuration window. Leave everything to default but select a user from the list to give him publishing permissions. You can select a user that you created/added before.
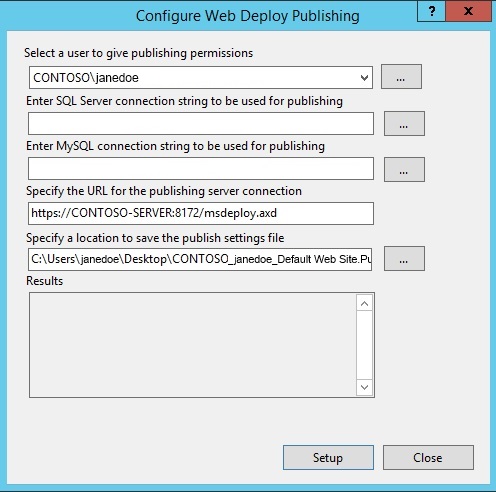
Configure Web Deploy Publishing
Now IIS is configured properly we need to open port 8172 (default) on your firewall and don’t forget to open it also on your router in your NAT table. Your server is now ready to accept deployments!
Deploying a website from Visual Studio 2013 to your server
Lets say you have an existing MVC project that you like to publish to your server. Right-click on your project (option is not available on solution) and choose publish.
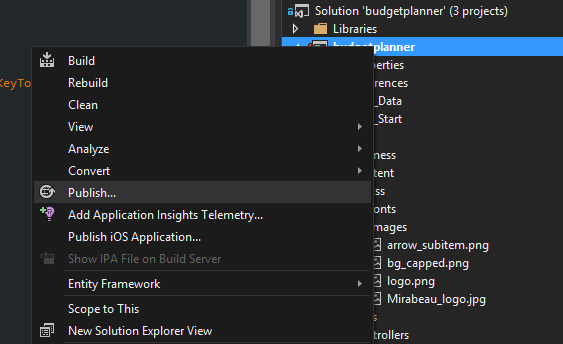
Publish option in Visual Studio 2013
In the Publish Web settings dialog create a new profile. Choose Custom as publish target and give your profile a name.
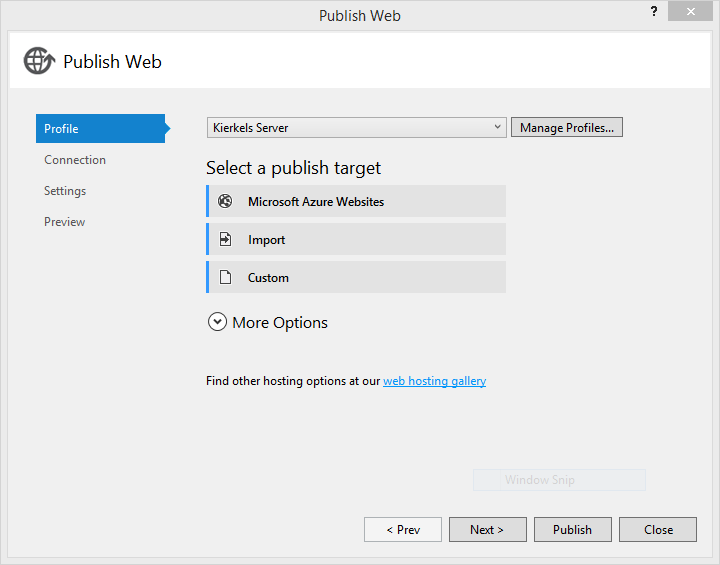
Publish Web Profile
On the connection dialog choose Web Deploy as publish method and fill in the username and password of the user you created above. If you used a windows user don’t forget to add the DOMAIN\Username domain in front of your username.
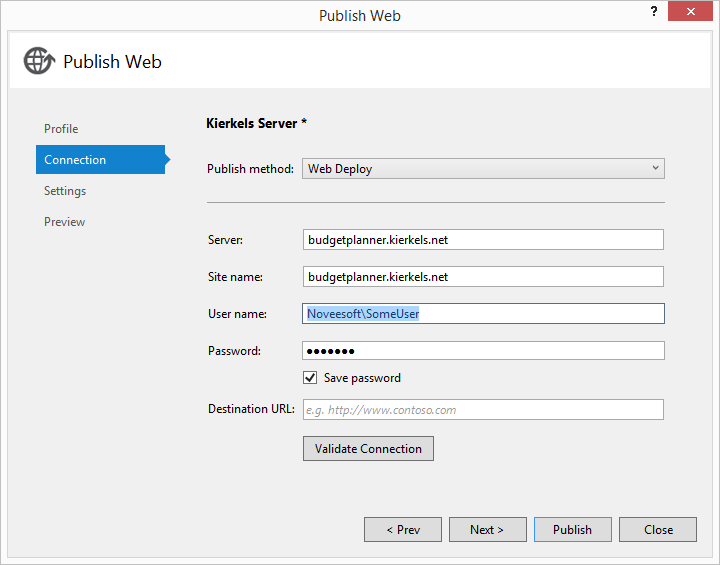
Publish Web – Connection
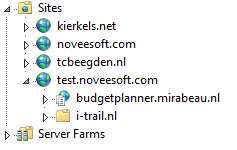
Important! The site name must exactly match with the name on the server. Check the image on the left. If your application is running under a site the site name must be: test.noveesoft.com\budgetplanner.kierkels.net.
Then there is one more interesting dialog called settings. First of all select Release as your configuration if your server is used as production server! Next you can use a different database connectionstring on your deployment server. This is a handy feature if your database requires a different user on the production server then on your local development machine. To make this work define two connectionstrings in your web.config
|
1 2 3 4 5 |
<connectionStrings> <clear /> <add name="DatabaseContext_Published" providerName="System.Data.SqlClient" connectionString="Server=localhost;Database=dbBudgetPlanner;User Id=****;Password=****;Trusted_Connection=False" /> <add name="DatabaseContext" providerName="System.Data.SqlClient" connectionString="Server=localhost;Database=dbBudgetPlanner;User Id=****;Password=****;Trusted_Connection=False" /> </connectionStrings> |
Then select the correct connectionstring in the dialog:
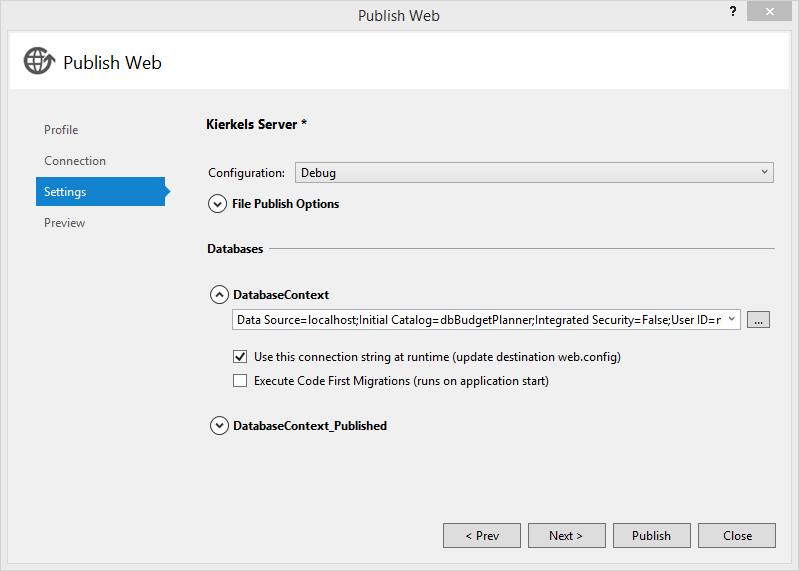
Web Deploy settings
Make sure you select the option Use thiis connection string at runtime (update destination web.config). otherwise nothing will happen. Now you are ready to publish!!