
General flow
Take a look at the diagram below. What I created so far is:
- Server – https://github.com/rcjkierkels/domotica-server
- Client – https://github.com/rcjkierkels/domotica-client
- Mobile app – https://github.com/rcjkierkels/domotica-app
Sorry for the missing documentation. It’s still a very early work-in-progress and I will add some documentation later. For now this blog is the best documentation there is :-).
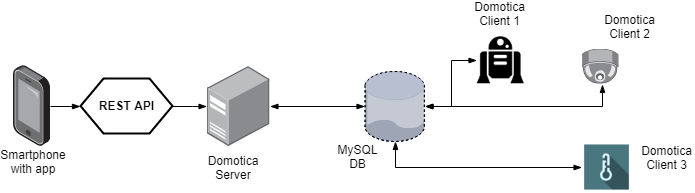
In the above diagram you control the domotica by using an Ionic webapp on your smartphone. It can be installed as any regular native app but it’s entirely written in Typescript/javascript using Angular4 and the Ionic UI toolkit. The app communicates with the domotica server (Laravel framework) using a Json Rest API with OAuth2 (Passport) for authentication. The domotica server again communicates (for now) with it clients through a Mysql database. Of course this will be changed in the future to an API so that we have more access control and are being able to use queuing services, caching etc. For my small project it works fine. Remember it’s all still a very early work-in-progress.
How it works?
A server can create jobs. Every job has one or more tasks. The tasks are executed by workers, which communicate their state of work through events. Events can trigger actions and they can again create new tasks if needed etc. This is simply said the flow of the domotica system between server and client.
Let’s start from the beginning. If a client is connected to the internet it will report itself to server, saying what MAC address it has, which IP address it has and which tasks it can perform. For example you can have a client with a camera, it can perform camera tasks. You can also have a client with a relais which can do switching tasks. You can even connect vendor clients like Philips Hue lights. In contradiction to custom clients the server will detect these clients instead of the clients reporting to the server.
On the server you create a new job. The job consists of tasks. You tell the server which tasks the job consists of and which clients will perform these tasks. You also specify on the server which actions need to be taken when a tasks generates an event. The client itself checks the server for new tasks and will execute an async worker to perform the tasks. So every client can do multiple tasks async (yes in PHP how cool is that!) with the help of this awesome package (https://github.com/spatie/async).
Lets take a look at an example. Let’s say we have a job that is ‘monitoring your garage door’. Take a look at the diagram below:
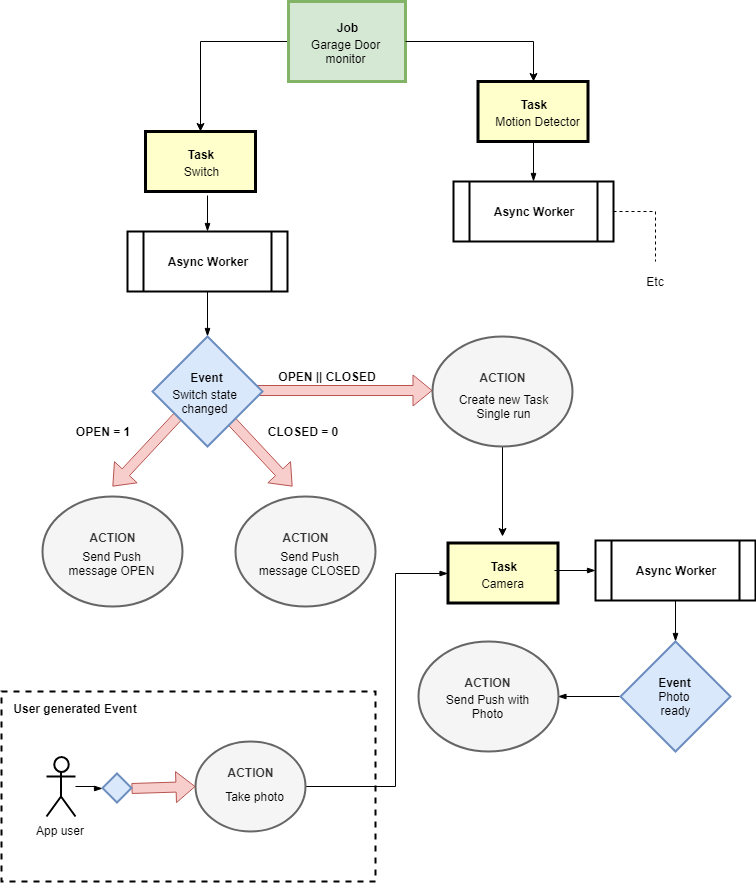
The job has two tasks. In my case I have one client that can perform multiple tasks. The client is a raspberry pi 2 with a camera, motion detector and magnetic contact on a single board. Therefor it can perform three different tasks. The switch task has a worker who watches the GPIO input pins of the raspberry pi board. When the state of a specific pin changes it detects it as a change of the switch state and fires an event. The event triggers a push action, which pushes data of the new switch state to the app of the user. The user receives a push notification that the garage door was opened or closed. The user then can create it’s own event, for example if he needs a photo of the current situation. That event also triggers an action which creates a new task, taking a photo. The system supports multiple actions on the same event. So you can also turn on a Philips Hue light AND send a push notication, then wait for an event that the light is turned on an trigger another action which then takes a photo when the light is on.
The system in real life
The photo at the beginning of the blog was my very first prototype a couple of years ago. As you probably see from all the wires it wasn’t the most stable domotica alarm available today :-). The unit was standalone, meaning it did not depend on any servers. This made it easy to get it fast up and running but in the long run it had it flaws and downsides. That’s why I decided to created a decentralized domotica system. A simple client, with simple software and a server which connects all clients together.

This is the magnetic switch currently hanging on my garage door detecting if the door is opened or not.
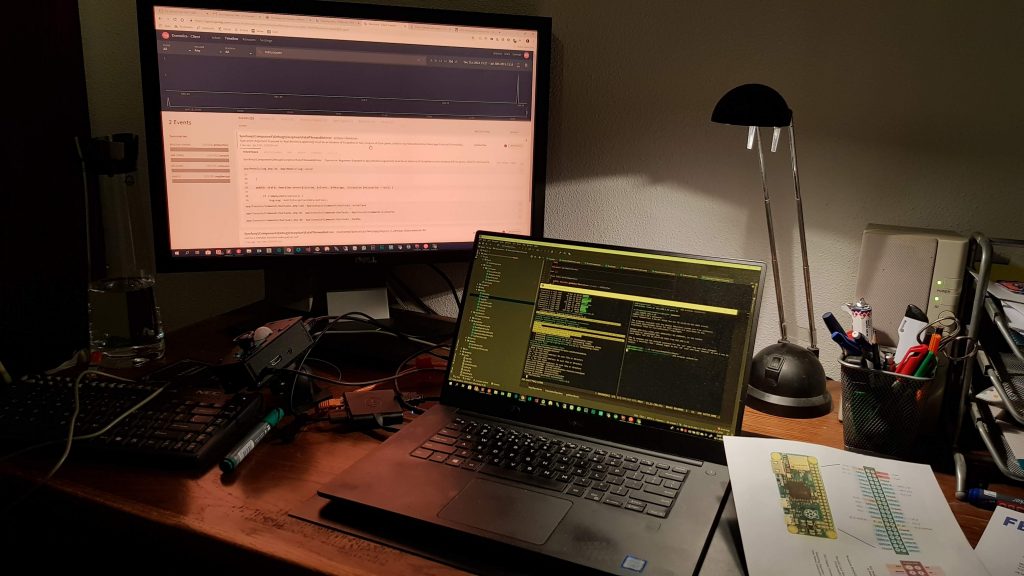
Beneath the monitor you can see the new client. Simple small black box containing a camera, motion detector and it’s able the read the state of the magnetic contact.
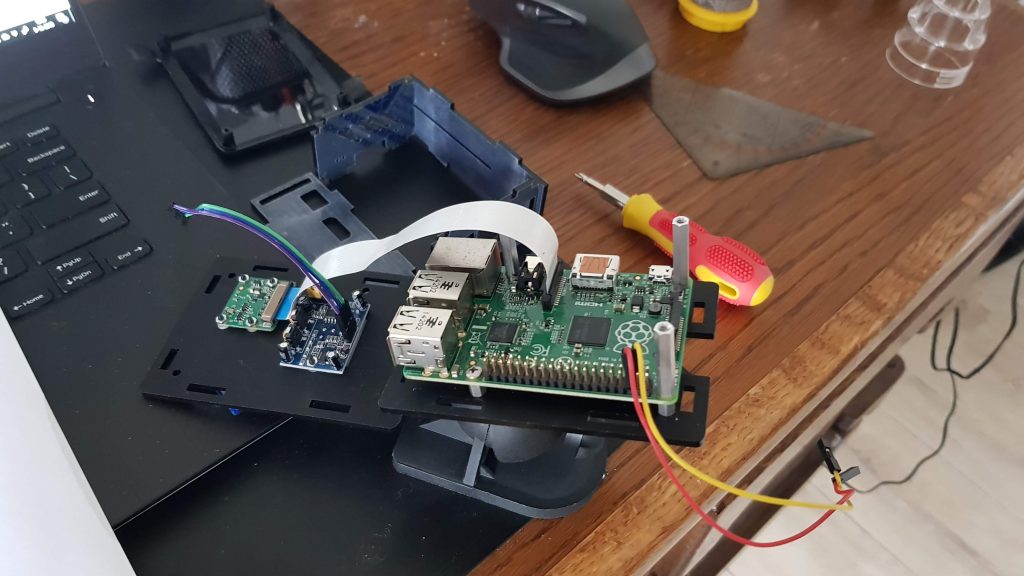
The new client unit. Inside the blackbox it’s just a raspberry pi and some sensors.