 In this tutorial we will add Twitter Bootstrap to our EPiServer project and we will create some base classes and our first ViewModel. Further I will explain the purpose of these base classes and the need for a ViewModel. Most of this is standard ASP.NET MVC so if you are already familiar with that you can probably skip this post.
Enhance your templates with Twitter Bootstrap
Remember that our original intention was to create a blogging website. Therefor I suggest you download this blogging bootstrap template to get started:
http://startbootstrap.com/template-overviews/blog-post/
After you downloaded it unzip it and you will see three folders:
- css
- fonts
- js
Copy these folders to your Static directory in your EPiServer project.
Next right click on the Views folder and create a new file _Root.cshtml.
Because _Root.cshtml has an underscore prefix, ASP.NET won’t send the page to a browser even if users request it directly.
This will be our base template for our website. Every other page is a partial of this page. Therefor we call it the root view.
The index.html file included in the blog-post.zip file we downloaded earlier is a good starting point for our _Root.cshtml.We have to strip out some code because now the file contains the whole website and it should only contain the base code.
|
1 2 3 4 5 6 7 8 9 10 11 12 13 14 15 16 17 18 19 20 21 22 23 24 25 26 27 28 29 30 31 32 33 34 35 36 37 38 39 40 41 42 43 44 45 46 47 48 49 50 51 52 53 54 55 56 57 58 59 60 61 62 63 64 65 66 67 68 69 70 71 72 73 74 75 76 77 78 79 80 81 82 83 84 85 86 87 88 89 90 91 |
<!DOCTYPE html> <html lang="en"> <head> <meta charset="utf-8"> <meta http-equiv="X-UA-Compatible" content="IE=edge"> <meta name="viewport" content="width=device-width, initial-scale=1"> <meta name="description" content=""> <meta name="author" content=""> <title>Blog Post - Start Bootstrap Template</title> <!-- Bootstrap Core CSS --> <link href="@Url.Content("~/Static/css/bootstrap.min.css")" rel="stylesheet"> <!-- Custom CSS --> <link href="@Url.Content("~/Static/css/blog-post.css")" rel="stylesheet"> </head> <body> <!-- Navigation --> <nav class="navbar navbar-inverse navbar-fixed-top" role="navigation"> <div class="container"> <!-- Brand and toggle get grouped for better mobile display --> <div class="navbar-header"> <button type="button" class="navbar-toggle" data-toggle="collapse" data-target="#bs-example-navbar-collapse-1"> <span class="sr-only">Toggle navigation</span> <span class="icon-bar"></span> <span class="icon-bar"></span> <span class="icon-bar"></span> </button> <a class="navbar-brand" href="#">Start Bootstrap</a> </div> <!-- Collect the nav links, forms, and other content for toggling --> <div class="collapse navbar-collapse" id="bs-example-navbar-collapse-1"> <!-- NAVIGATION: HERE --> </div> <!-- /.navbar-collapse --> </div> <!-- /.container --> </nav> <!-- Page Content --> <div class="container"> <div class="row"> <!-- Blog Post Content Column --> <div class="col-lg-8"> <!-- BLOGS: HERE --> @RenderBody() </div> <!-- Blog Sidebar Widgets Column --> <div class="col-md-4"> <!-- SIDEBAR: HERE --> </div> </div> <!-- /.row --> <hr> <!-- Footer --> <footer> <div class="row"> <div class="col-lg-12"> <p>Copyright © Your Website 2014</p> </div> </div> <!-- /.row --> </footer> </div> <!-- /.container --> <!-- jQuery Version 1.11.0 --> <script src="@Url.Content("~/Static/js/jquery-1.11.0.js")"></script> <!-- Bootstrap Core JavaScript --> <script src="@Url.Content("~/Static/js/bootstrap.min.js")"></script> </body> </html> |
Now lets take a closer look at this file. First notice that we have corrected all the static file that were included like javascripts and css. We used for this the the URL Helper @Url.Content(). What this helper does is convert any ‘virtual’ path to a real path.
Further we added a @RenderBody. This is were we insert the page you are visiting. So for example if you have an ‘About Us’ page then this page template is rendered (included) where we added the RenderBody statement. Of course ‘About Us’ should then be a partial view of _Root.
More information about RenderBody, RenderPage, RenderSection can be found here:
http://www.codeproject.com/Articles/383145/RenderBody-RenderPage-and-RenderSection-methods-in
Next lets open our StartPage/Index.cshtml page that we created in our previous tutorial. When somebody loads this startpage we like it to be rendered inside the _Root template. To make that happen we need to add a @Layout statement to the file and remove all <html>,<head> and <body> tags. Remember that this page will be pasted inside the _Root template where we put the @Renderbody tag so it should not contain any tags like <html> etc.
|
1 2 3 4 5 6 7 8 9 10 11 |
@model EPiServerBlogTutorial.Models.Pages.StartPage @{ Layout = "~/Views/Shared/_Root.cshtml"; } <h1>@Html.PropertyFor(x => x.Header)</h1> <div> @Html.PropertyFor(x => x.Blogs) </div> |
Now open your startpage in your browser and it should look like this:
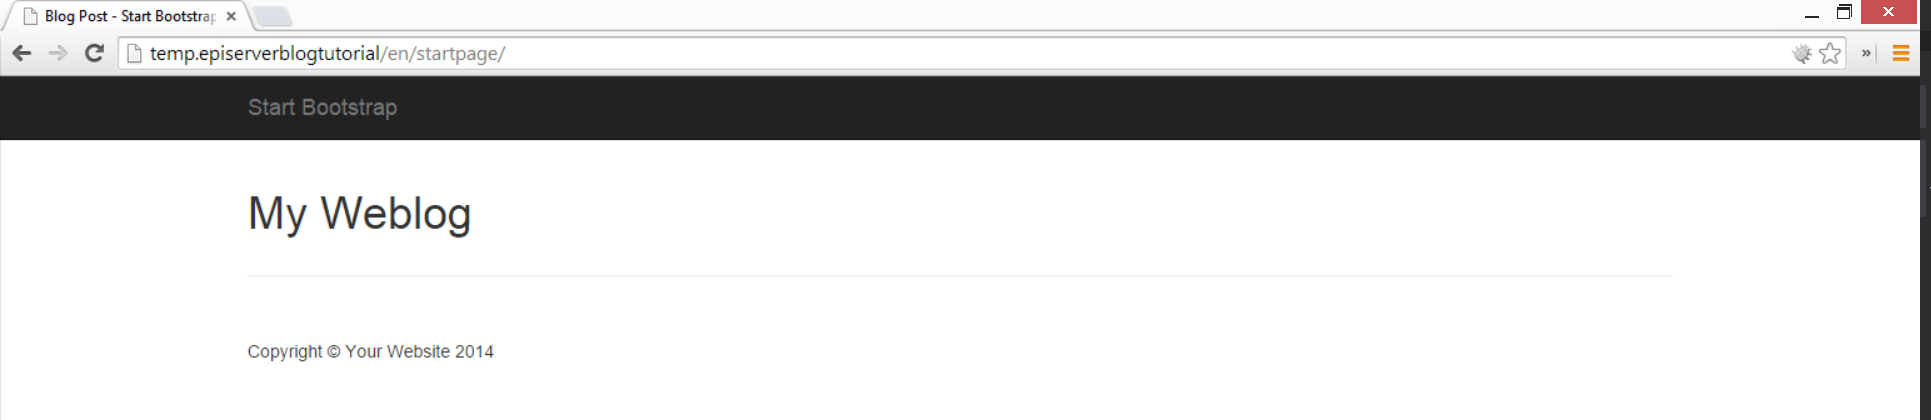
Empty EPiServer StartPage
Before we are ready I want to point out one more thing. ASP.NET MVC supports the use of _ViewStart.cshtml. This is a special file that will be included before every view is rendered. We can use this file to include the _Root view on every view that is loaded instead of putting this code on every view:
|
1 2 3 |
@{ Layout = "~/Views/Shared/_Root.cshtml"; } |
So create a new file ~/Views/_ViewStart.cshtml and put the above code in this view and remove it from the StartPage Index.cshtml page. Now refresh the page in your browser, you should see no difference.
More information about _ViewStart.cshtml can be found here:
http://www.jittuu.com/2011/10/28/ViewStart-in-MVC-3/
Base classes
Next lets talk about base classes. If you have taken a look at the Alloy Sample page you probably noticed that every page controller inherits from a PageControllerBase class. The idea behind using base controller classes is to put functionality in here that should be available by all page controllers like action filters for output caching or a logout method.
The same applies to base classes for (page type) models. If you check the Alloy Sample page you will see that most page type models inherit from SitePageData. For page type models its interesting to use base classes for global properties like page meta data.
ViewModels
A view model represents only the data that you want to display on your view/page. But it can also contain some (auto)generated data like a concatenation of firstname and lastname properties into a single name property. Creating and using a ViewModel is easy.
ViewModels should be placed in the directory ~/Models/ViewModels and should have names like this StartPageModel.cs. An example of the use of a ViewModel will I give now:
Lets say this is your model (Models/StartPage.cs)
|
1 2 3 4 5 6 7 8 9 10 11 12 13 14 15 16 17 18 19 20 21 22 23 24 25 26 27 |
namespace EPiServerBlogTutorial.Models.Pages { [ContentType( DisplayName = "Start Page", GUID = "af17ac0f-df70-417a-959c-61ddcde5c686", Description = "Simple blog start page" )] public class StartPage : PageData { [CultureSpecific] [Display( Name = "Title Page", Description = "This will be the title of your page", GroupName = SystemTabNames.Content, Order = 1)] public virtual string Header { get; set; } [CultureSpecific] [Display( Name = "Blogs", Description = "Blogs will be put in this area", GroupName = SystemTabNames.Content, Order = 2)] public virtual ContentArea Blogs { get; set; } } } |
A ViewModel could now look like this (Models/ViewModels/StartPageModel.cs):
|
1 2 3 4 5 6 7 8 9 10 11 12 13 14 15 16 17 18 19 20 21 |
namespace EPiServerBlogTutorial.Models.ViewModels { public class StartPageModel<T> where T: StartPage { public T CurrentPage { get; set; } public StartPageModel(T currentPage) { this.CurrentPage = currentPage; } // Extra autogenerated properties public int AmountOfBlogs { get { if (this.CurrentPage.Blogs == null) return 0; return this.CurrentPage.Blogs.Count; } } } } |
Next you need to adjust your view (Views/StartPage/Index.cshtml):
|
1 2 3 4 5 6 7 8 9 |
@model EPiServerBlogTutorial.Models.ViewModels.StartPageModel<EPiServerBlogTutorial.Models.Pages.StartPage> <h1>@Html.PropertyFor(x => x.CurrentPage.Header)</h1> <div> @Html.PropertyFor(x => x.CurrentPage.Blogs) </div> <div> Amount of blogs: @Model.AmountOfBlogs </div> |
And last you need to pass the correct model to your view from the controller:
|
1 2 3 4 5 6 7 8 9 10 11 12 |
namespace EPiServerBlogTutorial.Controllers { public class StartPageController : PageController<StartPage> { public ActionResult Index(StartPage currentPage) { var model = new StartPageModel<StartPage>(currentPage); return View(model); } } } |
Thats it. Rebuild your project and now you should see the amount of blogs property on your StartPage.
This is ofcourse the very basics of ViewModels. I recommend to take a look at the Alloy Sample project how they use ViewModels there.